Open QR Manager
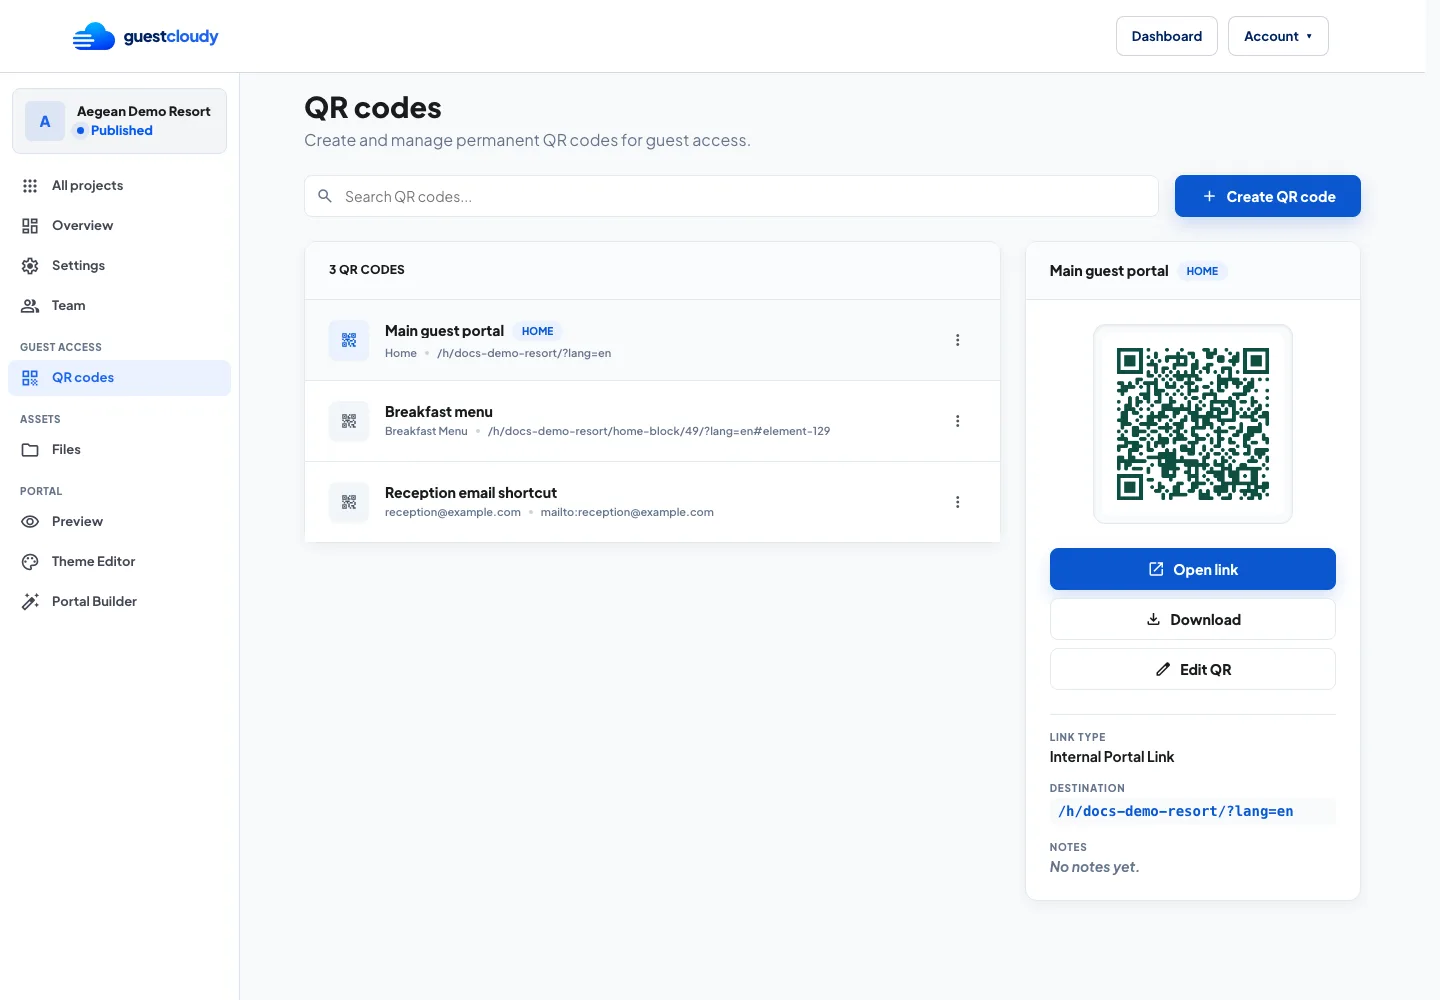
Open your project and choose QR codes from the dashboard navigation. QR Manager keeps all guest access codes in one place, including the main portal QR and any extra codes you create for specific destinations.
The main QR is pinned because it is the safest code to print for general guest access. Additional QR codes can be created for menus, spa information, downloadable files, Wi-Fi, contact links, and other shortcuts.
Choose a destination
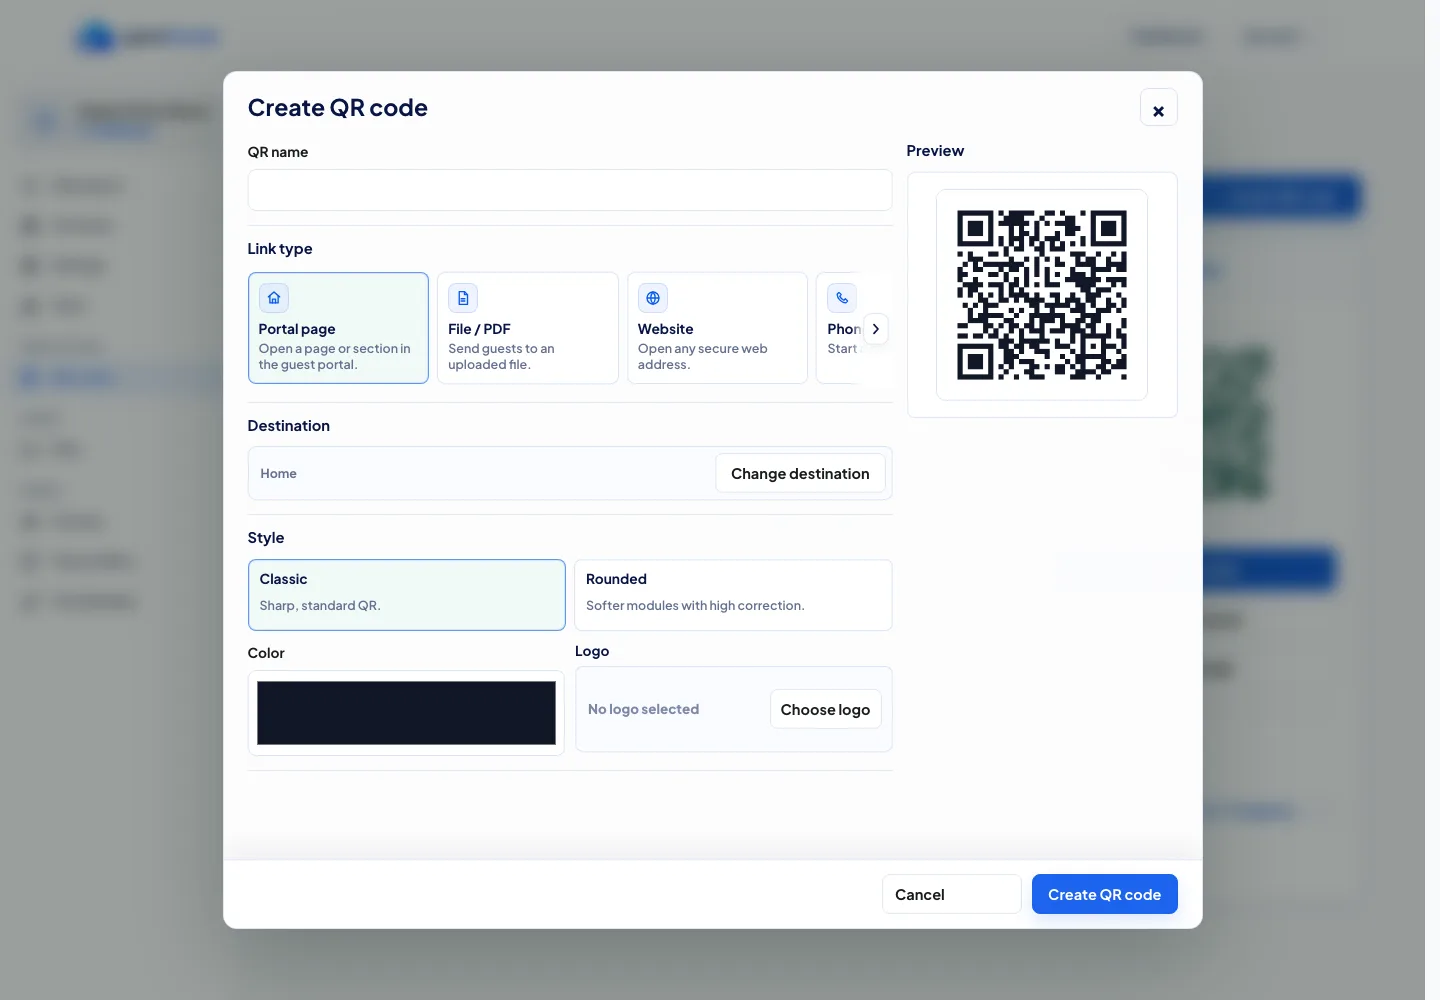
Select Create QR code to open the editor. Start with a clear QR name, then choose what the QR should open when guests scan it.
Use simple names that match where the QR will be placed, such as Breakfast Menu, Pool Bar Menu, Wi-Fi Card, or Reception Shortcut. This makes the list easier for your team to scan later.
Link QR codes to the portal, pages, files, and shortcuts
Guestcloudy supports several useful QR destinations:
- Internal portal links send guests to Home, a page, a group, an element, or a specific detail.
- Files open an uploaded project file, useful for PDFs, maps, event programs, or brochures.
- External URLs send guests to another website or booking tool.
- Phone, email, and Wi-Fi shortcuts help guests contact your team or connect quickly.
For printed hotel material, internal portal links are usually the best first choice because you can keep improving the destination content without replacing the QR code.
Style, preview, and download
Choose a style and a dark QR color so the code stays scannable. Test the final code before sending it to print.
Use the download options for the format you need: PNG for quick use, SVG for crisp design work, and PDF for print workflows.
Keep permanent QR codes stable
Each managed QR code has a permanent Guestcloudy path. That means printed QR codes keep working even when you edit portal content or adjust the public destination behind the QR.
Before printing a large batch, open the QR link from the details panel and scan a test print. After that, update the destination from QR Manager whenever the guest journey changes.
More guides