Open Portal Builder
After signing in, open your project and choose Portal Builder from the dashboard navigation. This is where you organize the guest-facing portal content that appears behind your QR code.
The builder starts from the Home level. From there you can add top-level content, create grouped sections, and decide which items are visible to guests.
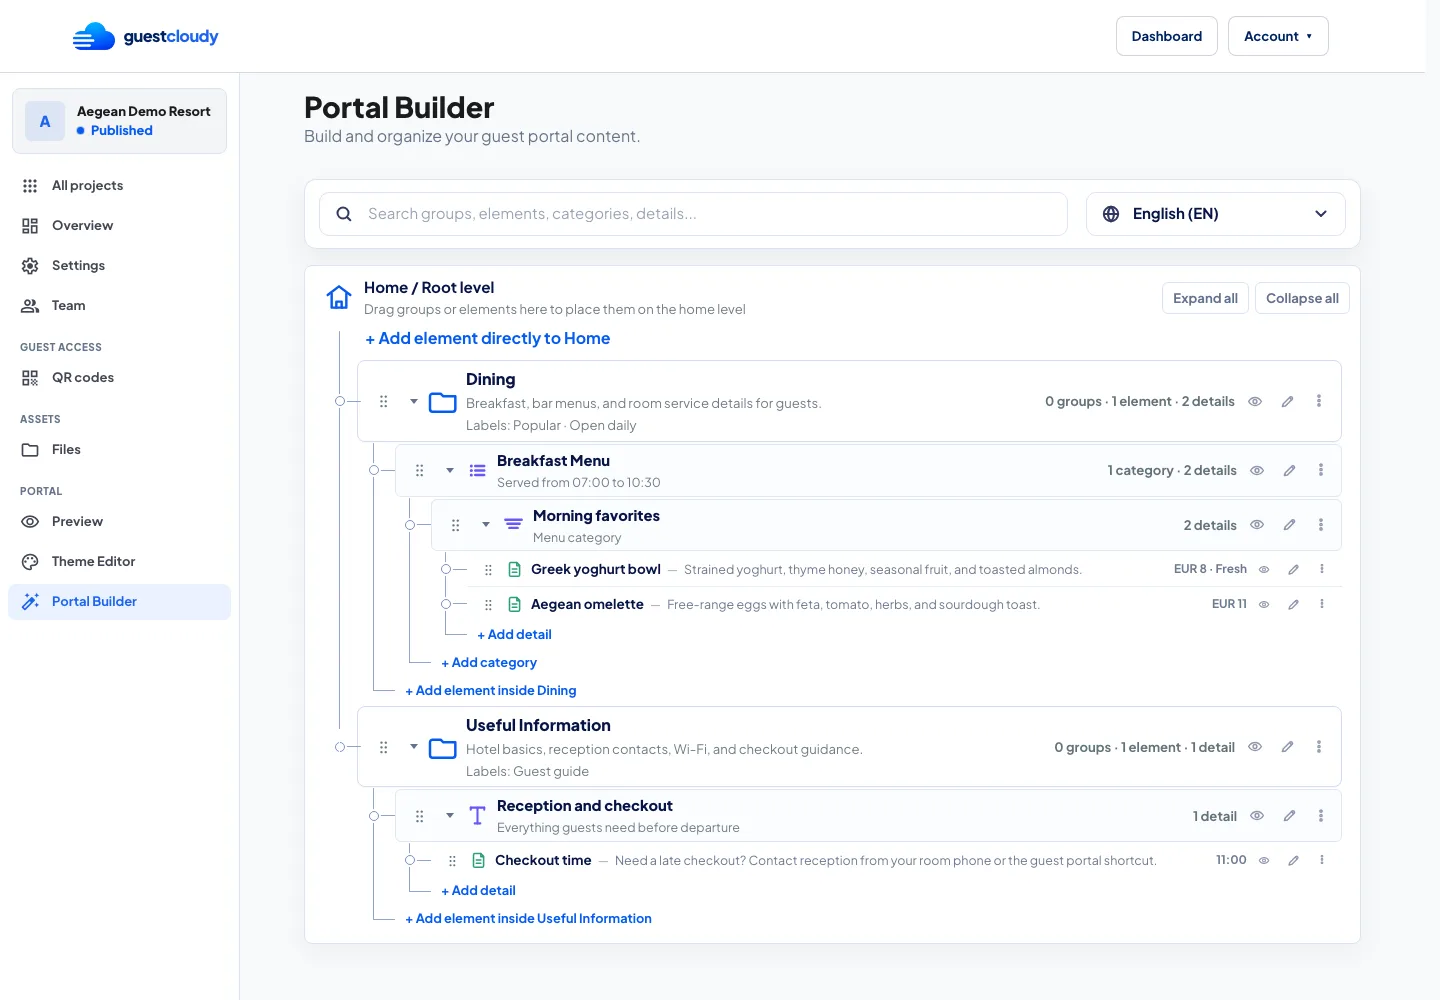
Understand the structure: Groups, Elements, Details
Portal Builder uses a simple hierarchy so you can keep the guest experience tidy:
- Groups collect related content, such as Dining, Spa, or Useful Information.
- Elements are the content blocks guests interact with, such as text, menus, galleries, action buttons, tables, and feeds.
- Details are the individual rows or items inside an element, such as a menu dish, service note, contact link, or announcement.
Use groups when guests need a clear category. Use elements when you are adding the actual content guests will read or tap.
Add your first content
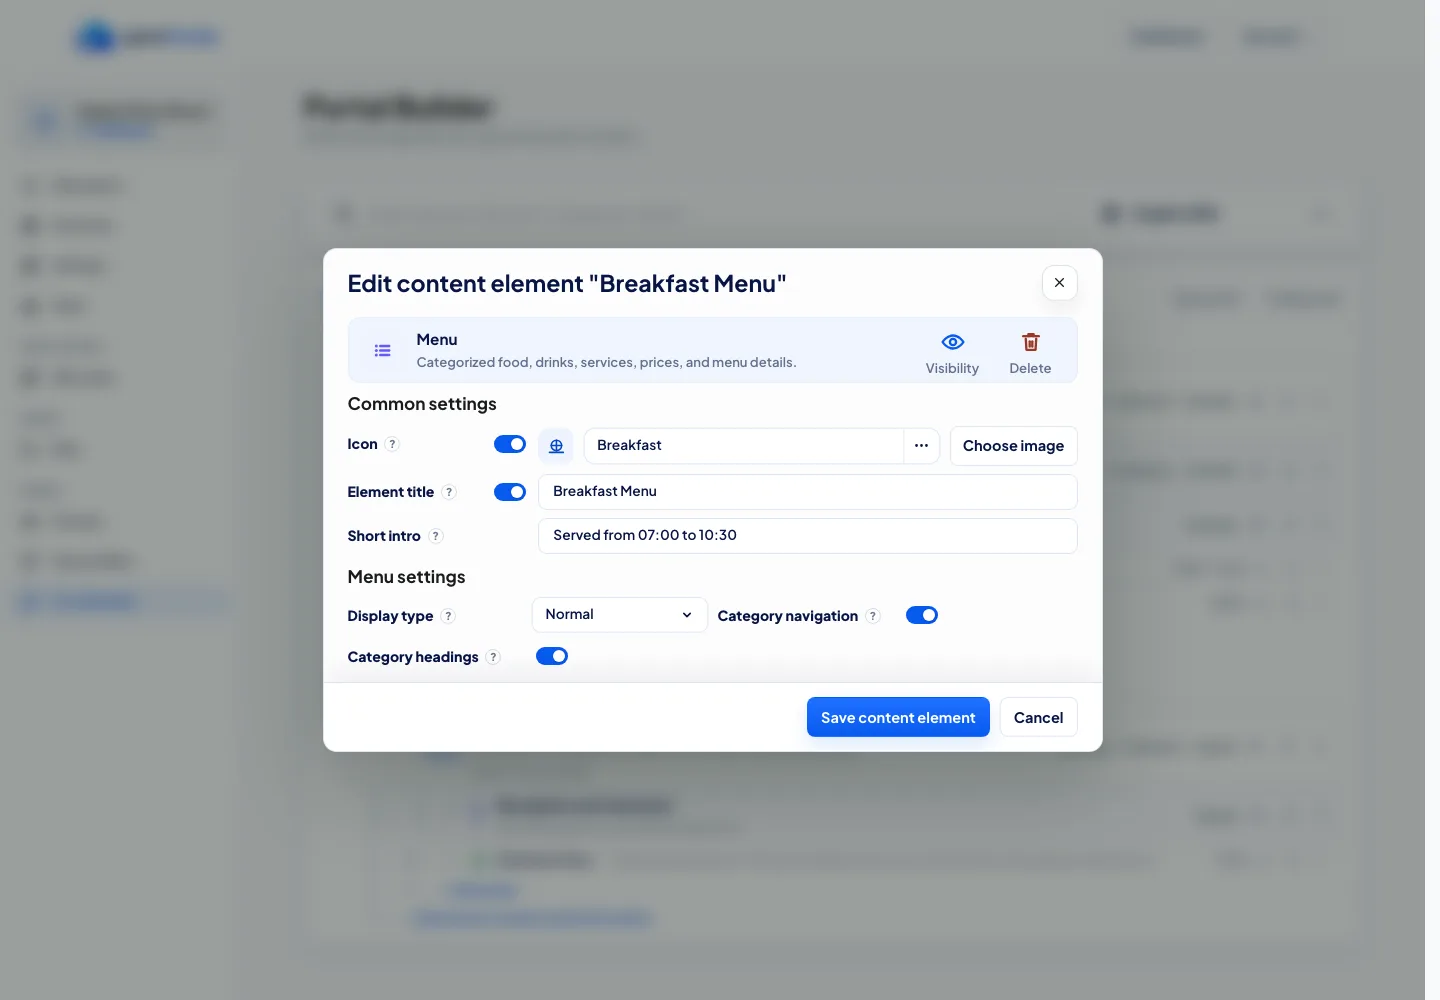
Start small. Add one group, then add one element inside it. For example, create a Dining group, add a Menu element, and add a few details for breakfast or room service.
Give every item a clear internal name so your team can recognize it later. Then add the guest-facing title, description, image, price, button text, or link fields that match the element type.
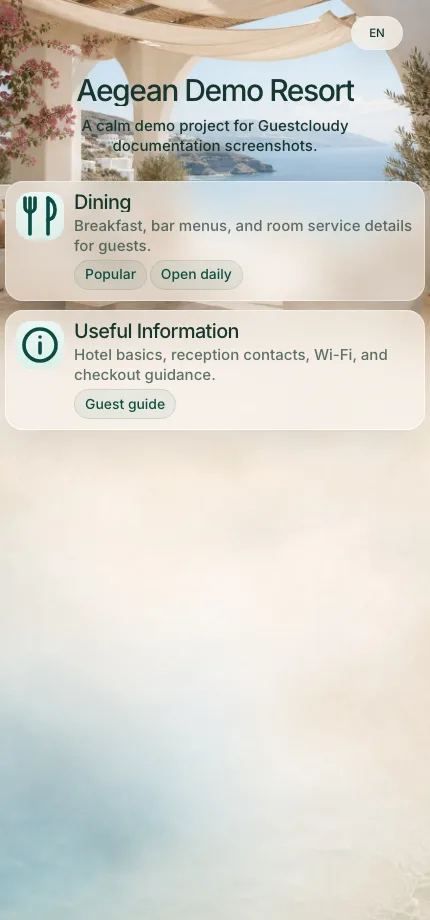
Preview the guest experience
Use the project preview to check how the portal feels on a phone before guests see it. Confirm that the order makes sense, labels are short enough to scan, and important details are easy to reach.
Previewing is especially useful after reordering groups or adding details, because it shows the portal from the guest's point of view rather than the admin tree.
Publish and share with QR
When the portal looks ready, make sure the project is published and has active access. Then open QR Manager to use the permanent QR link for the portal or for a specific internal destination.
Guests can scan the QR code from printed material, in-room signage, table tents, or reception displays. When you update Portal Builder later, the same QR code continues to point to the latest published content.
More guides